Dear friends, I hope you are doing great in your personal and professional lives. We want you to feel happy in your life by being able to do lots of creative things. Now to the point of writing today’s article. I know lots of you already blog or write in various websites or even in your personal sites but you don’t know how things work or at least how to set up a platform by yourself to blog. Well, I here am to help you by providing you with a series of articles to make you an expert from the very beginning to how you can monetize your pages. I would like to suggest first of all that you invest some bucks by learning things from us which are posted here and at the same time write for other blogs & even for us ! Then when you are ready, just jump on your site and start blogging there. So it’s very simple!
Now lets come back to my article. Today I am going to show you how to install a WordPress blog. This will be the start of a series of articles covering the basics of installing and using WordPress aimed at new-comers to WordPress and to CMS usage also.
In this tutorial article, I am going to:
- Show you from where you can get WordPress ( Even if you already know !)
- Upload the latest WordPress release via FTP or Web based up-loader by your web host.
- How to create a database on some popular web hosts.
- How to create a username and give the proper permission for the database.
- Install WordPress !
One more thing. In most cases, probably your web hosts going to provide you a one click Installer from where you can install it also. Just take a look at your hosting control panel and you will get it! In future, we will include articles on this in this series also.
Downloading WordPress
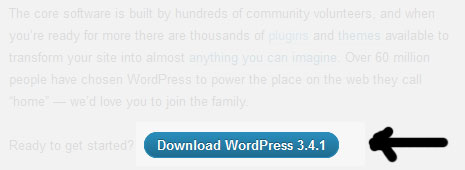
Go to the official WordPress site and click the Download button on the right. At time of writing, the latest version is 3.4.1.
Once download completed , extract the wordpress folder. Using your preferred FTP client, transfer these files to your web host. You can also use the web based up loader.
If you are not familiar with FTP, or forgot the login details for your account, please consult your web host’s documentation as the details can vary between hosts.
Alternatively, you could use the File Manager provided in your web host’s Administration area.
For this example, I will be uploading the WordPress files to a folder named blog on my website – which will make my installation accessible at http://www.example.com/blog.
Creating a Database
WordPress requires a database to store all information generated by it such as posts, pages, comments and settings.
The next few steps can vary between host-to-host, but the basic steps involved will be the same. If you cannot find a certain option, please consult your web host’s documentation or contact their customer support.
Login to your web-hosting account page. On there, you should see a ‘Manage Databases’, ‘MySQL Databases’ or similar button.
One of the most-used control panels for web-hosting accounts is ‘cPanel’. If your host uses this, it should look:
Here, you will need to create a new database. Enter a name for it and click ‘Create’. You will then be presented with a success screen with the full name of your new database.
WARNING: Take special note of your new database name. Most web hosts will add a prefix to the beginning of its name – making wpdata become mysite_wpdata (for example).
Database User
You will now need to assign a new database user to your database so WordPress and read and write to the database.
Under where you created a database, you should see the heading ‘Current Users’. Here, enter a username and password for your database and click ‘Create’. You will then see a success screen confirming these details.
WARNING: As before, take special note of your database username. Most web hosts will add a prefix to the beginning of it – making wpuser become mysite_wpuser (for example).
The All-Important Bit!
On the same page as before, there is a heading ‘Add Users To Your Databases’. From the two drop-down boxes in this section select the database and username we created.
Ensure ‘ALL’ is selected for the Privileges and click ‘Add’.
Database Hostname
Again, on the same page is a heading ‘Access Hosts’. On probably 99% of hosts, you should see ‘localhost’. If not, take special note of this, it’s your hostname.
Installing WordPress
It’s all straight-forward from here. In your web-browser, go to the location on your site you uploaded WordPress, eg. http://www.example.com/blog.
You should be asked to create a WordPress Configuration file. Click the button to continue and then ‘Lets Go!’ on the next page.
On this page, you will need to enter the database name, username, password and hostname which we created in the previous steps.
You can leave Table Prefix as it is.
On the next page, press ‘Run the install’.
Enter your a name for your Blog and your email address and press ‘Install’.
You will now be taken to the Success page with your Administrator login details. Make special note of these details, and hit ‘Log In’ to get started with your brand-new WordPress Blog!
Summary
Congratulations! You have just learnt how to install WordPress. Please don’t forget to give your feedback so that we can continue to help you in your learning and development.
Read More: Be A Blogger Series – Part 2: Say Hello to WordPress Dashboard


[…] Follow the first article of this series : Be A Blogger Series – Part 1: How to install WordPress […]
Nice post i must say. Excellent informative post.
[…] Be A Blogger Series – Part 1: How to install WordPress […]